
I love playing the flute! It’s a fun and beautiful instrument to play. Yet, it’s not an easy instrument to play well. It requires dedication, effort, and consistent practicing, to make the flute sound beautiful.
Why do musicians spend time on warm-up exercises? Why not just go straight to the solos? Solos are made up of scales and intervals. Learn scales and intervals, and you will incorporate those skills into every solo that you learn.
For example, if you are learning the first movement from the Sonata in C Major, by J. S. Bach, you might practice the C scale to help you learn that movement. When you move on to Bach’s Sonata in e minor, if you have been practicing the G Major and e minor scales, you are well prepared to learn those movements.
And, if you are learning the first movement of the Sonata for Flute by Francis Poulenc, and if you have been practicing intervals, then you are well prepared to play the intervals in that piece.
So, warming up with scales and intervals is the key to learning flute solos efficiently and well.
FLUTE WARM-UP EXERCISES
- LONG TONES
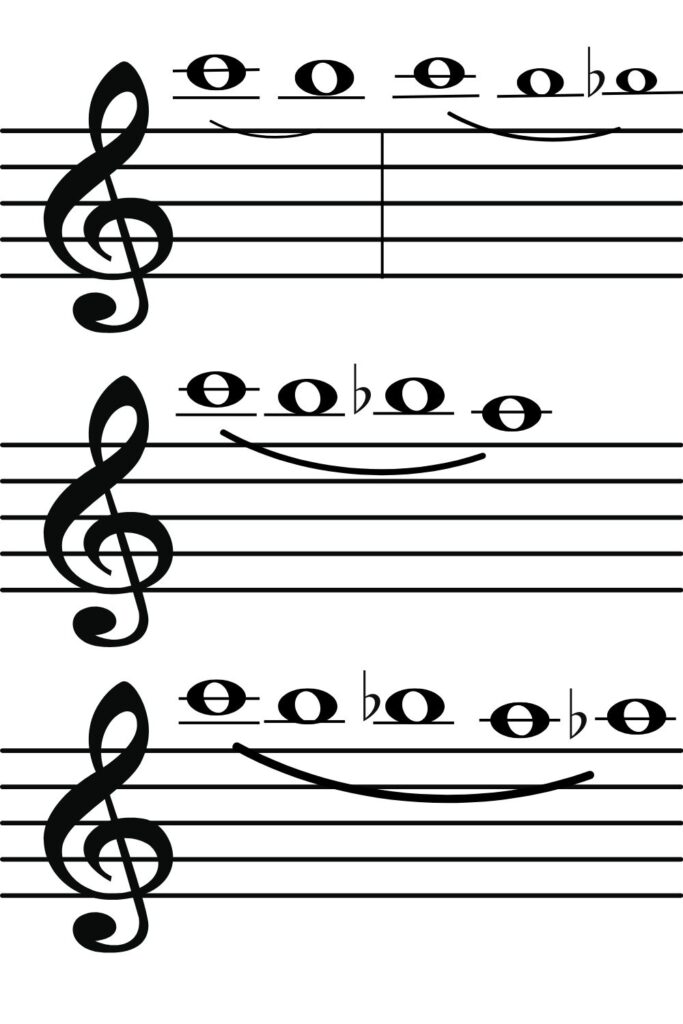
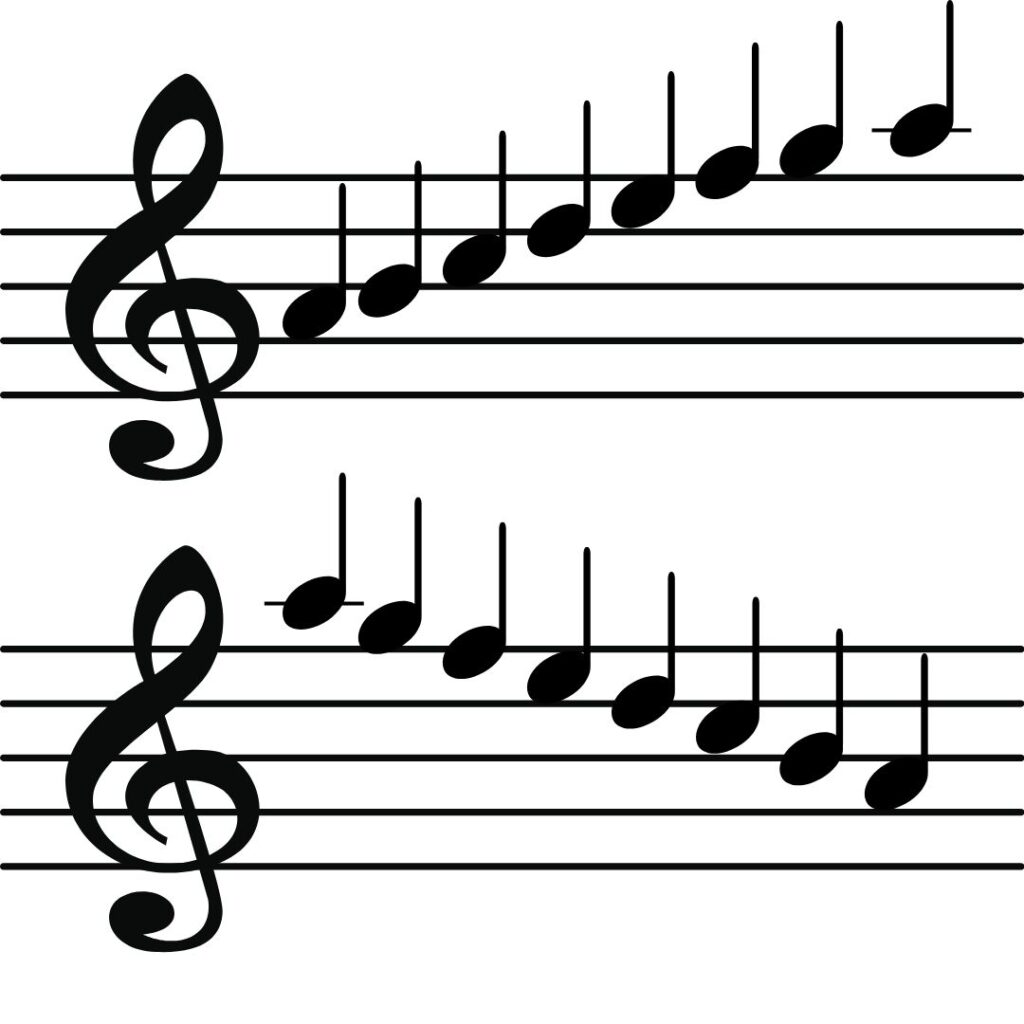
Do these with no vibrato, and listen for clarity and purity in your tone. Start with playing long tones, listening to your tone and making it as smooth and as even as possible. Start on the C above the low C, and play long tones chromatically downward, slurring. Take a deep breath for each group, and use all of your air. Use note groups of 2, 3, 4, or 5. Then play from B, going downward chromatically. Then from B-flat, etc.
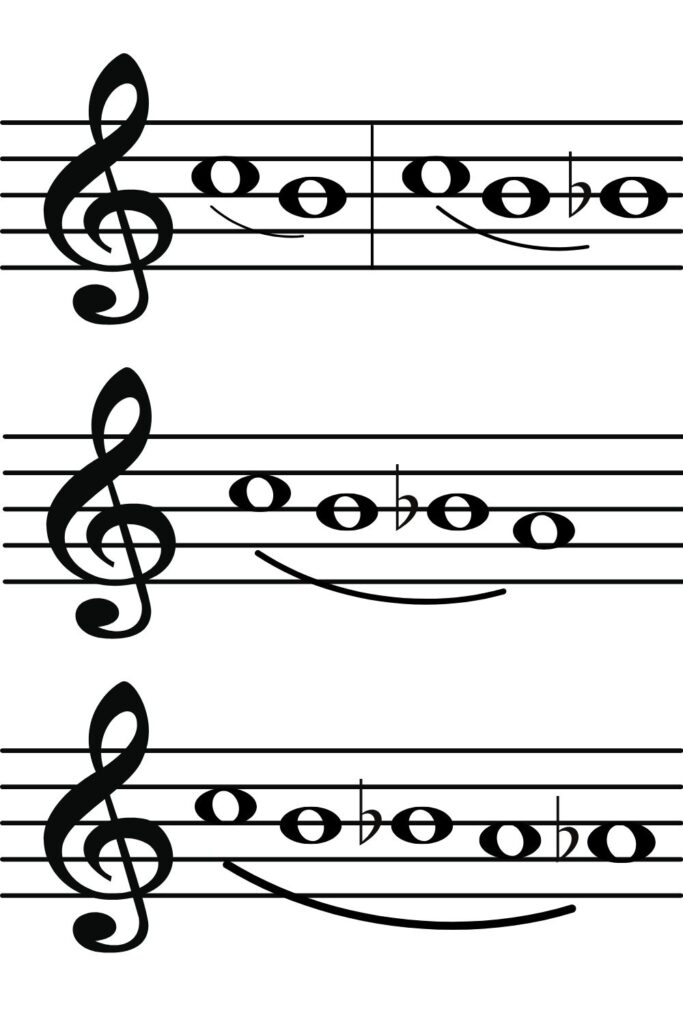
Then start from low C, and do this same exercise going up chromatically.
Go on to the second octave, starting on the C above the low C, and working your way up chromatically. Go as high as you comfortably can. Do this on all the notes of the chromatic scale.
Then go from as high as you comfortably can, and do this exercise coming down chromatically. Do this on all the notes of the chromatic scale.
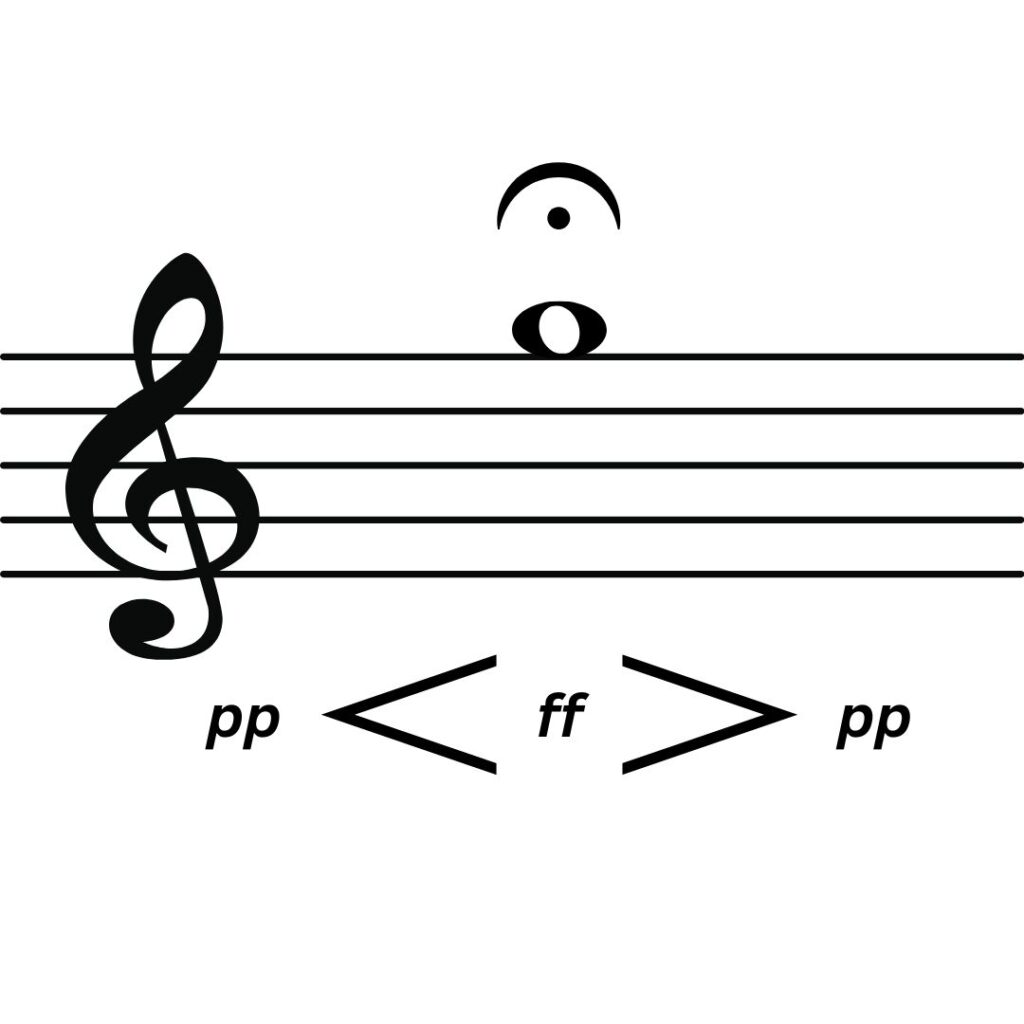
Do this exercise next:
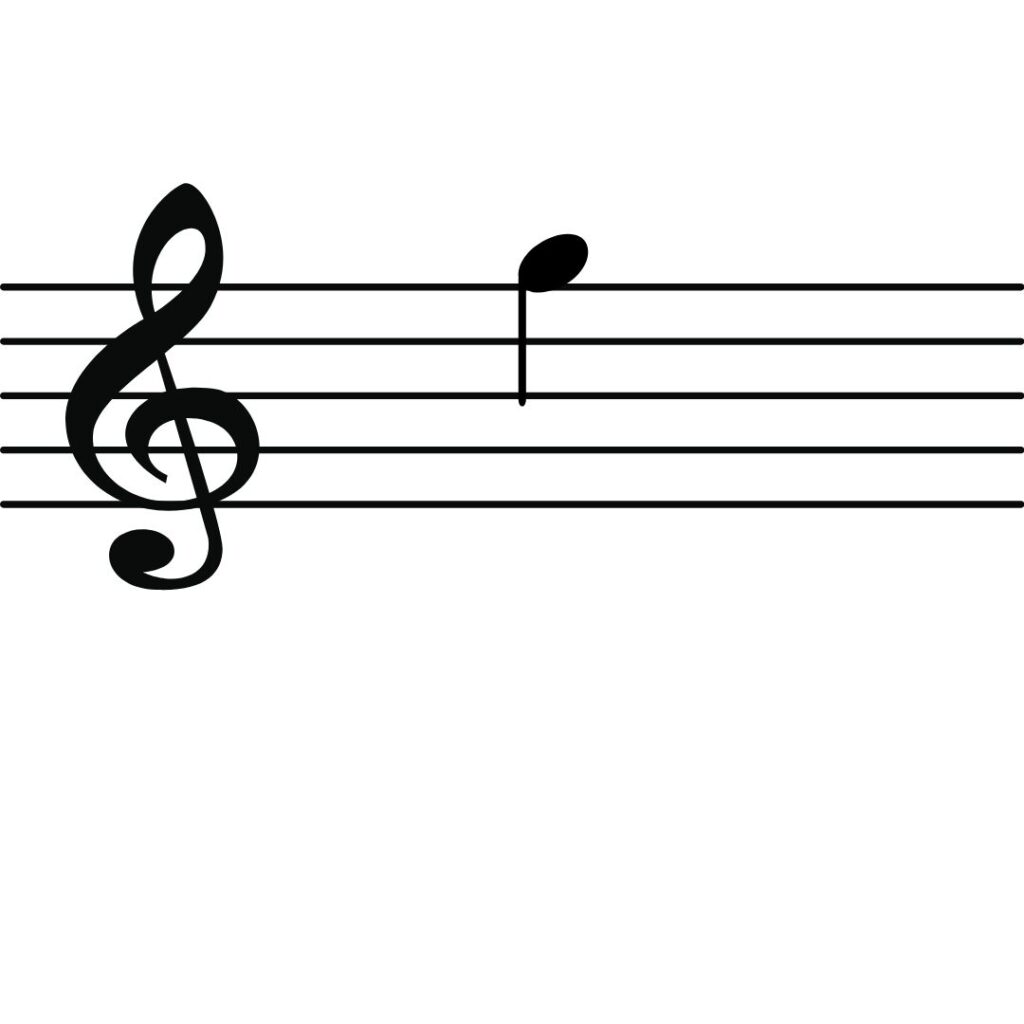
Play one tone, with a crescendo then a decrescendo. Start in the second octave, somewhere where you are comfortable. Possibly on G. Do this in one breath and with no vibrato. Take a deep breath, and use all of your air. Listen to your intonation and for consistency and evenness in your tone. Stand right in front of a wall or your refrigerator, so that the sound bounces back to you. And listen!
Work your way up chromatically. Go as high as you comfortably can. Then go back to where you started and go down chromatically.
2. MAJOR & MINOR & CHROMATIC SCALES
Major Scales
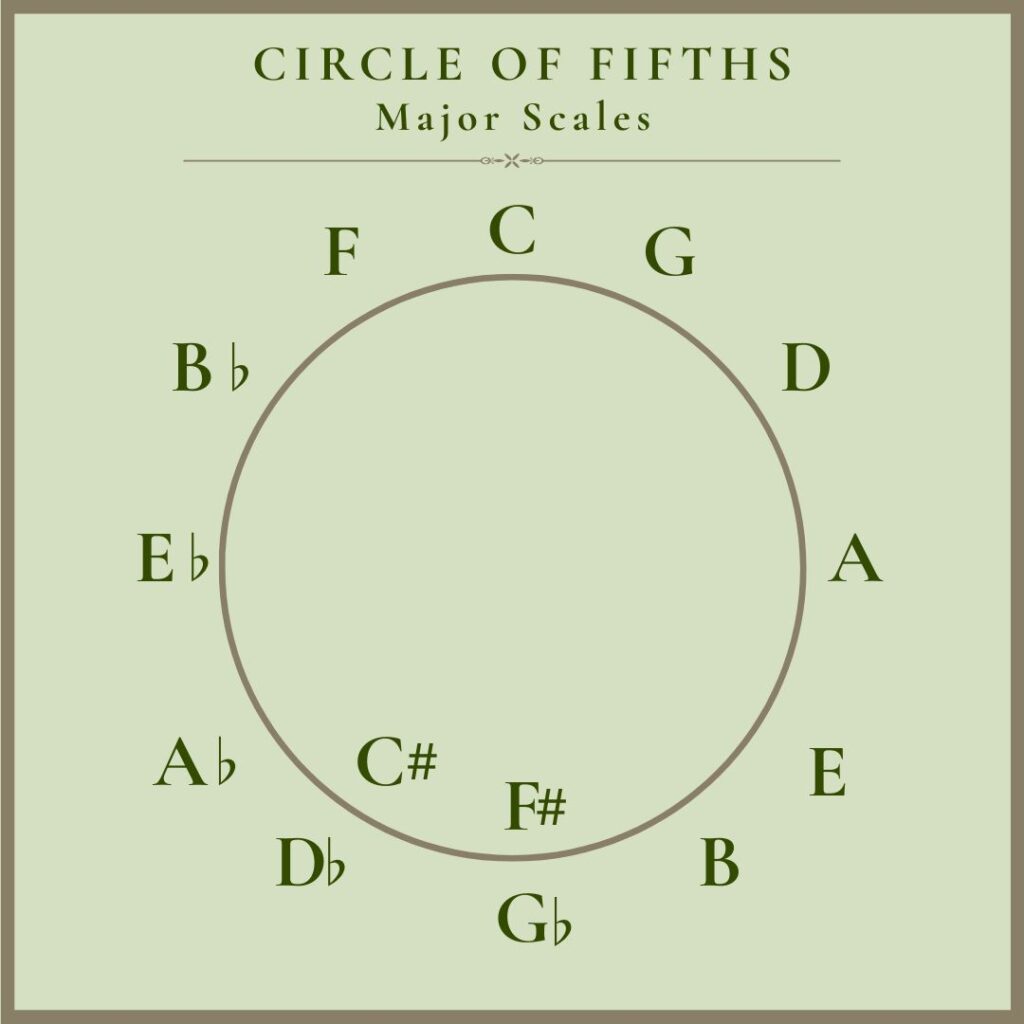
Go through the Major Scales, going through the whole Circle of 5ths. Start with the C Major Scale, and play from C-C, 2 octaves, slurred. Then play the scale on every note of the scale. So, the C major scale from D-D (Not the D Major scale), then the C Major scale from E-E, etc. All the way up. Then move on to the G Major Scale, and play that 2 octaves, slurred. Then, on every note of the scale. Do this around the whole Circle of 5ths. Use a metronome, and keep the notes even. Move the metronome up a notch at a time, as you can.
Minor Scales
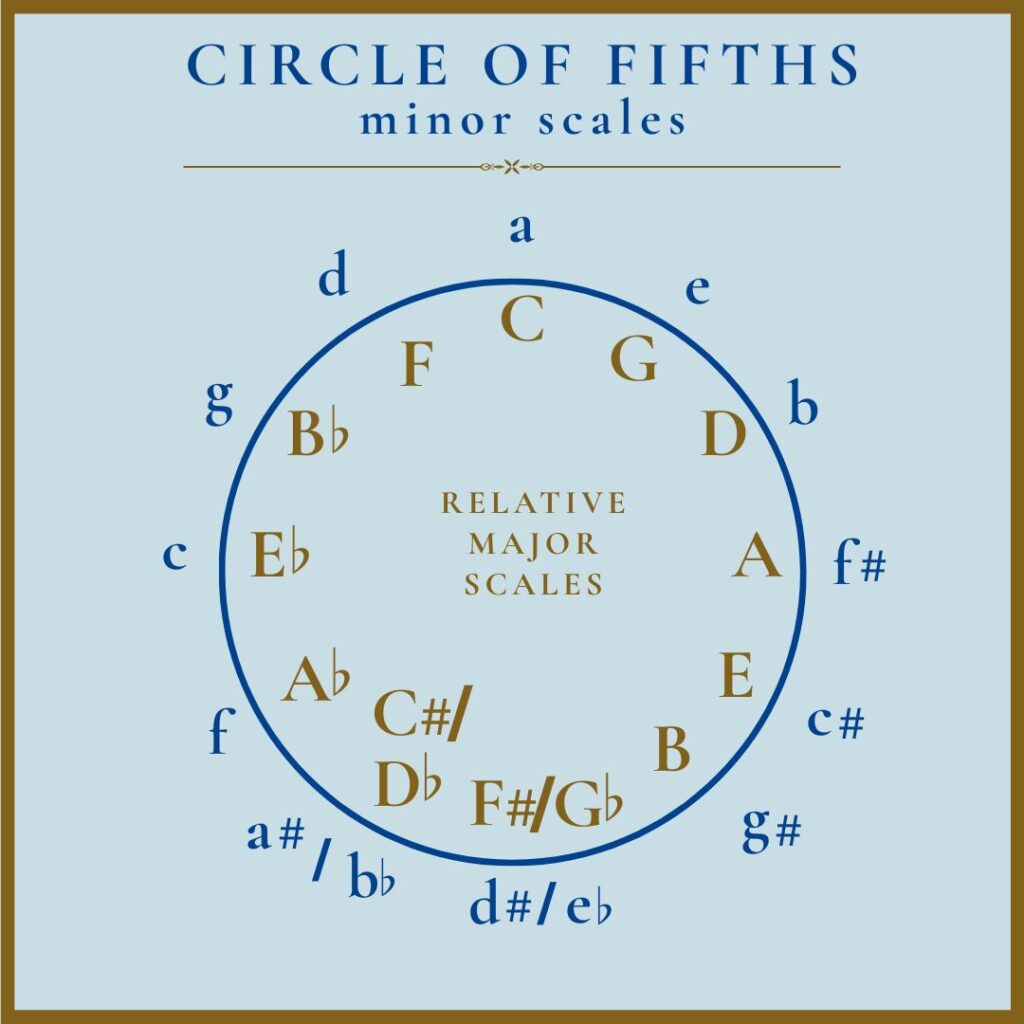
Then go through the harmonic minor and melodic minor scales, 2 octaves each, slurred. And use a metronome, speeding it up as you can.
You may want to play each minor scale right after you play its relative major scale. For example, play the C Major scale, on all the notes of the scale. Then play the a harmonic minor scale and the a melodic minor scale. (Note that you have already played the a natural minor scale, when you were going through the major scale exercise.)
Break this up throughout the week, and keep track of where you are in the Circle of 5ths. That way you get through the whole Circle of 5ths and you don’t forget where you are and start over with C!
Minor Scales have their own patterns, so let’s take a look at those.
Minor Scale Patterns:
All major scales have three corresponding relative minor scales. Let’s use the C Major Scale as an example.
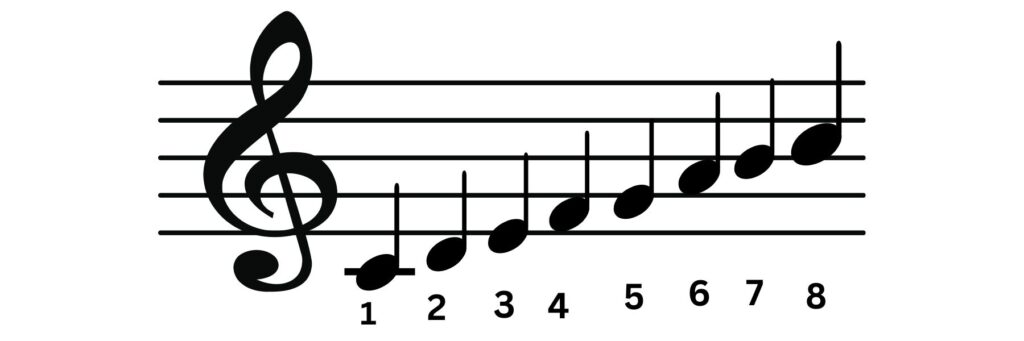
C Major Scale
C D E F G A B C
To find the relative minor scales for C Major, go 1 1/2 steps down from the root or I of the scale. So, 1 1/2 steps down from C. So, the relative minor scale for C Major is a minor.
These are the three a minor scales, with their patterns.
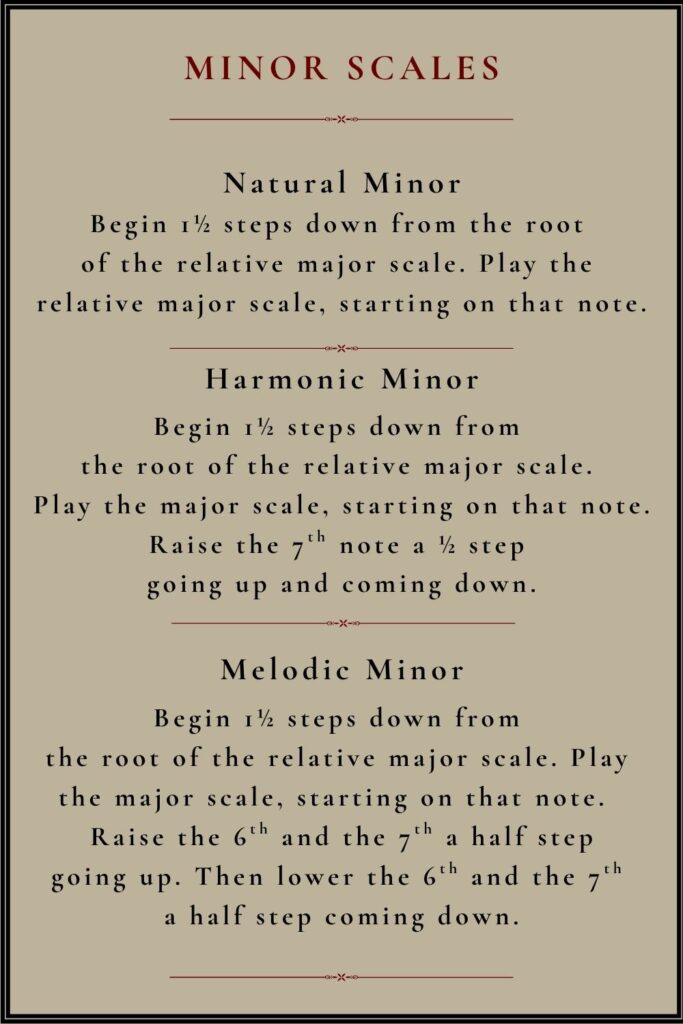
Natural Minor:
Begin 1 1/2 steps down from the root or I of the relative major scale. Play the scale from that note, up and down.
a b c d e f g a g f e d c b a
Harmonic Minor:
Begin 1 1/2 steps down from the root or I of the relative major scale. Play the scale from that note. Raise the 7th 1/2 step going up and coming down.
a b c d e f g# a g# f e d c b a
Melodic Minor:
Begin 1 1/2 steps down from the root or I of the relative major scale. Play the scale from that note. Raise the 6th and the 7th 1/2 step going up, then lower the 6th and the 7th 1/2 step coming down. So, coming back down, it’s a natural minor scale.
a b c d e f# g# a g f e d c b a
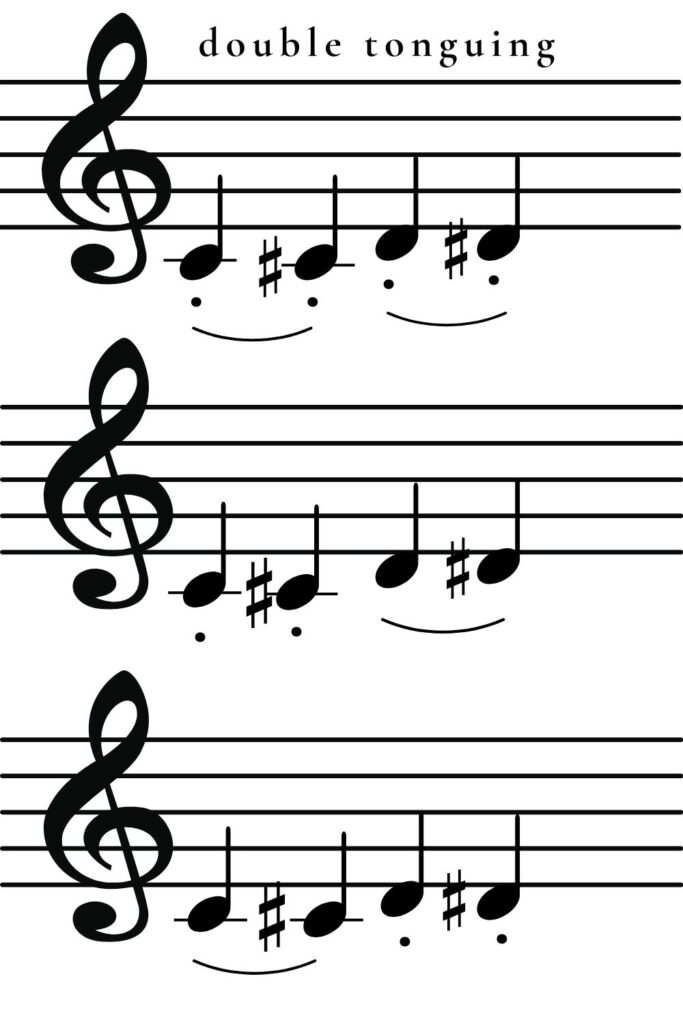
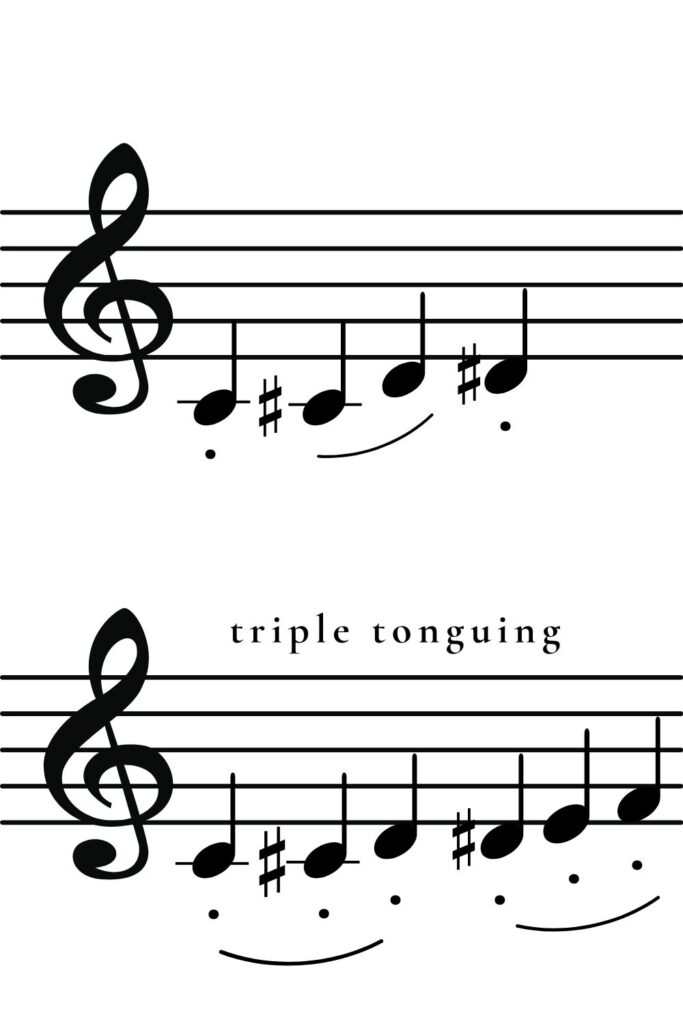
Chromatic Scales
Start on low C, and go up chromatically, 2 octaves. Do this twice. Repeat this on every note of the chromatic scale, up to C above low C. Use different articulation patterns, using double and triple tonguing. And make sure every note has sound, not just air!
Daily practice of major, minor, and chromatic scales will ensure that you have the ability to play these scale passages in the solos that you are learning. If you look closely at your music, you will see scale passages everywhere!
3. INTERVALS
These interval exercises use every interval, from 2nds to 8ths! Slur these and go as high as you comfortably can. Once you are comfortable with playing these interval patterns, add the metronome. Start slowly and work your way to playing faster in a slow and comfortable way. Even and slow notes sound better than uneven and fast notes!
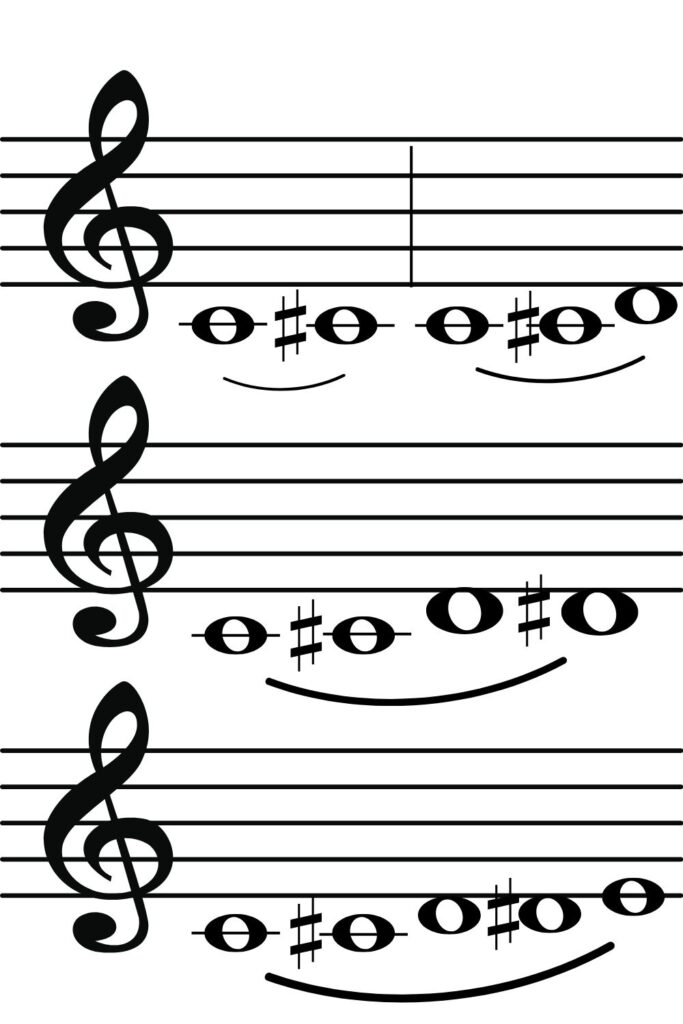
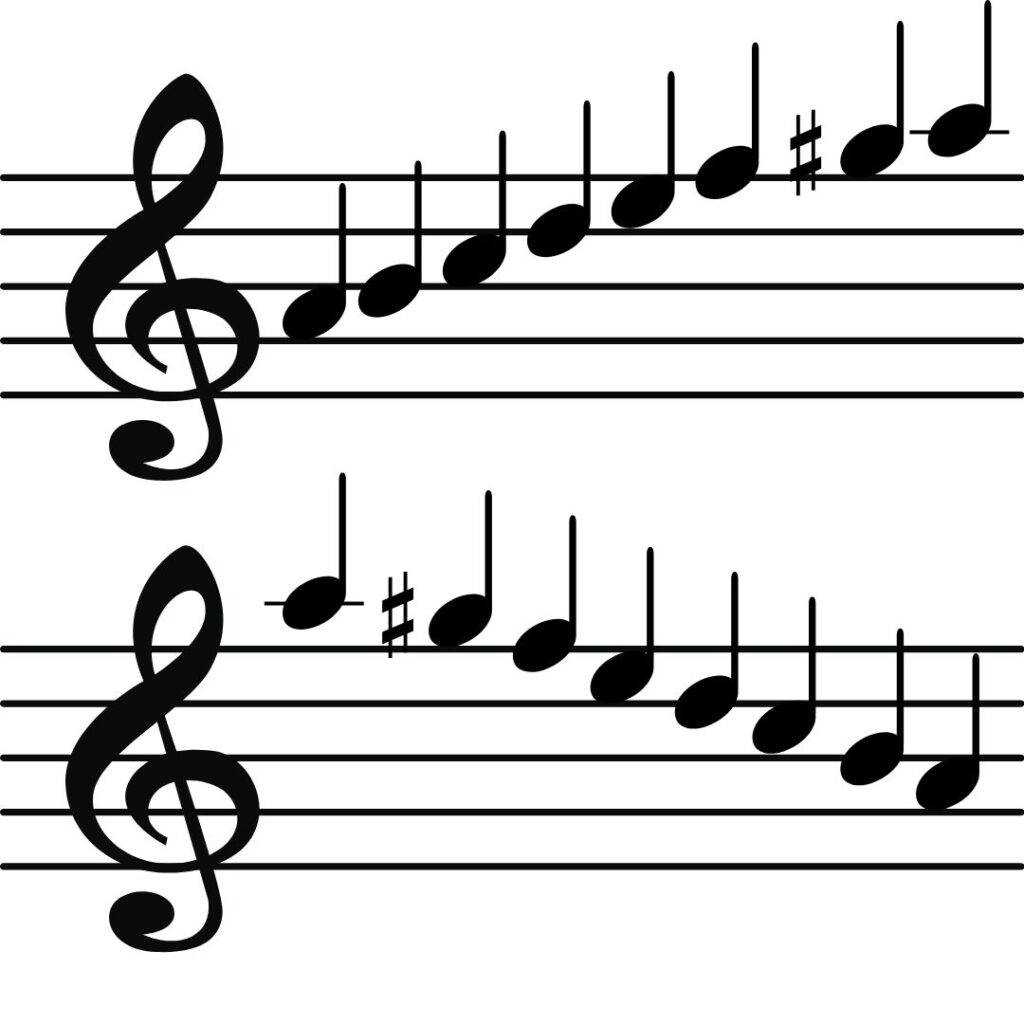
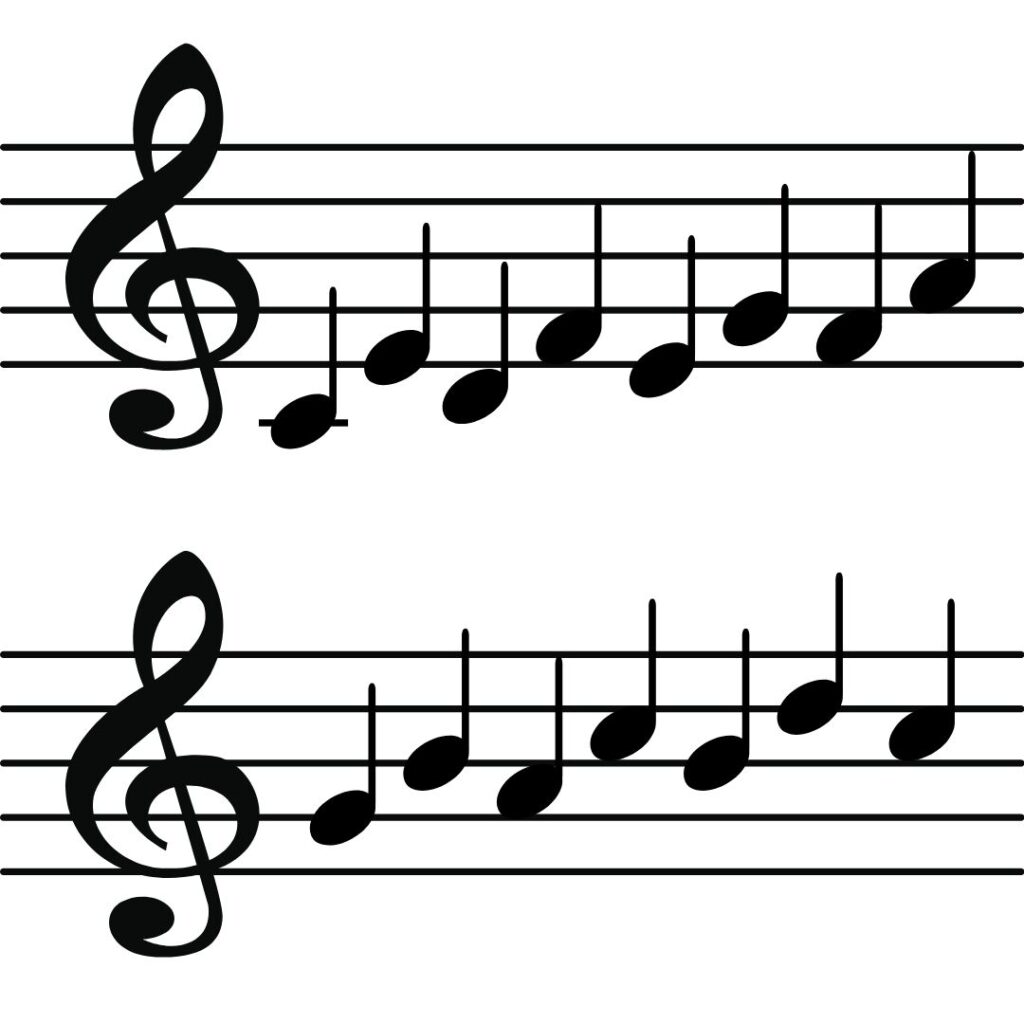
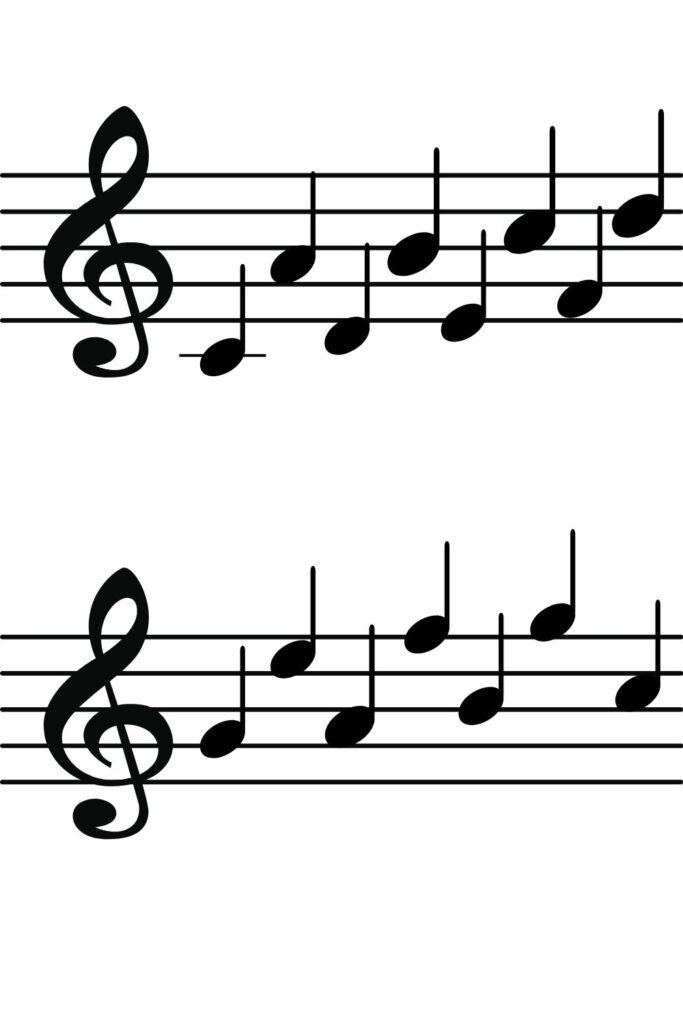
2nds, 3rds, and 4ths:
Start on low C, and go up a 3rd and down a 2nd:
So, C up a 3rd to E, down a 2nd to D, up a 3rd to F, down a 2nd to E, etc.
Up: C E D F E G F A G B A C B D C
Then,
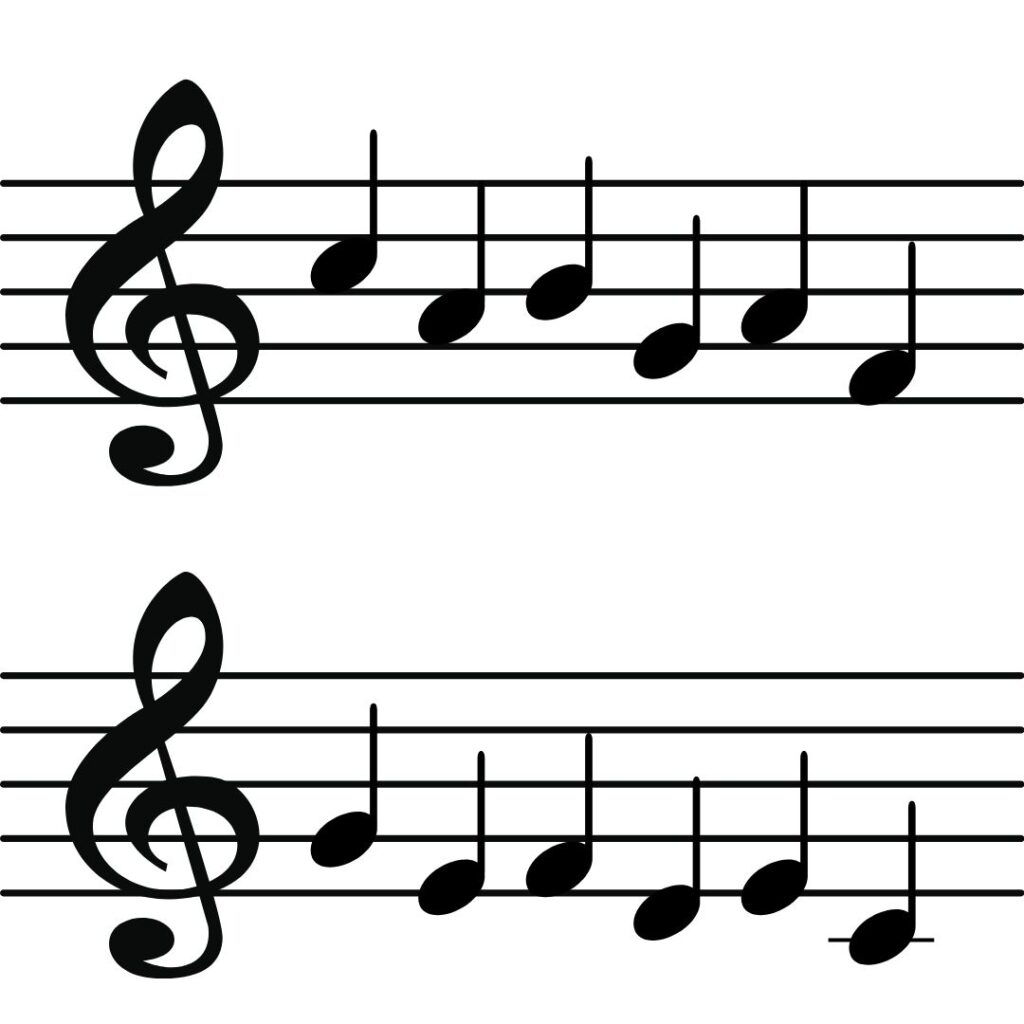
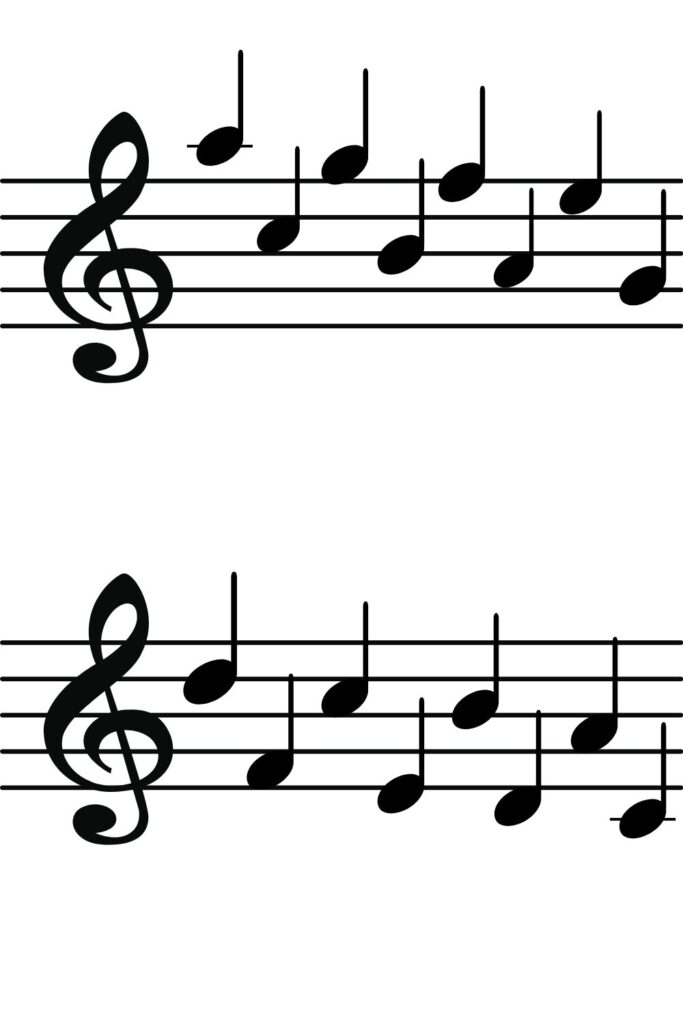
Come down a 3rd and go up a 2nd
So, C down a 3rd to A, up a 2nd to B, Down a 3rd to G, up a 2nd to A, etc.
Down: C A B G A F G E F D E C
Then,
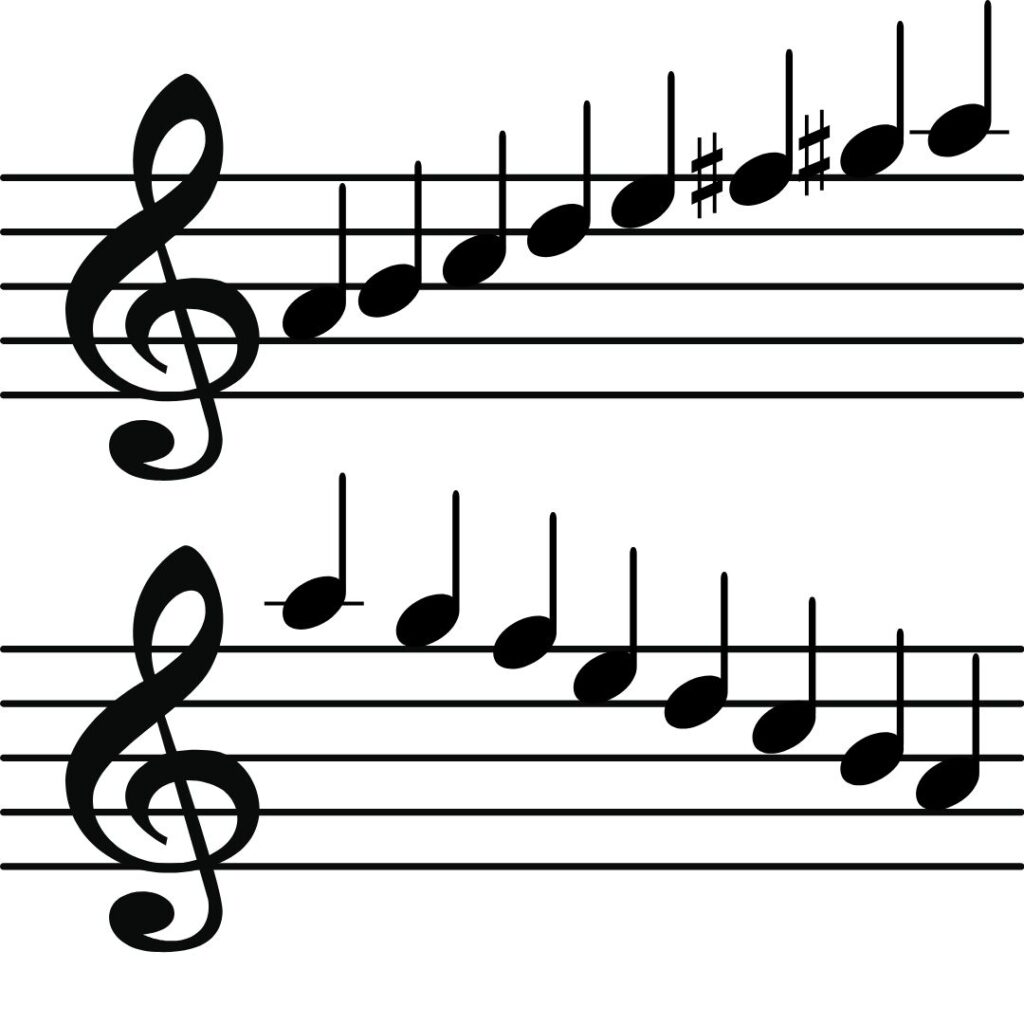
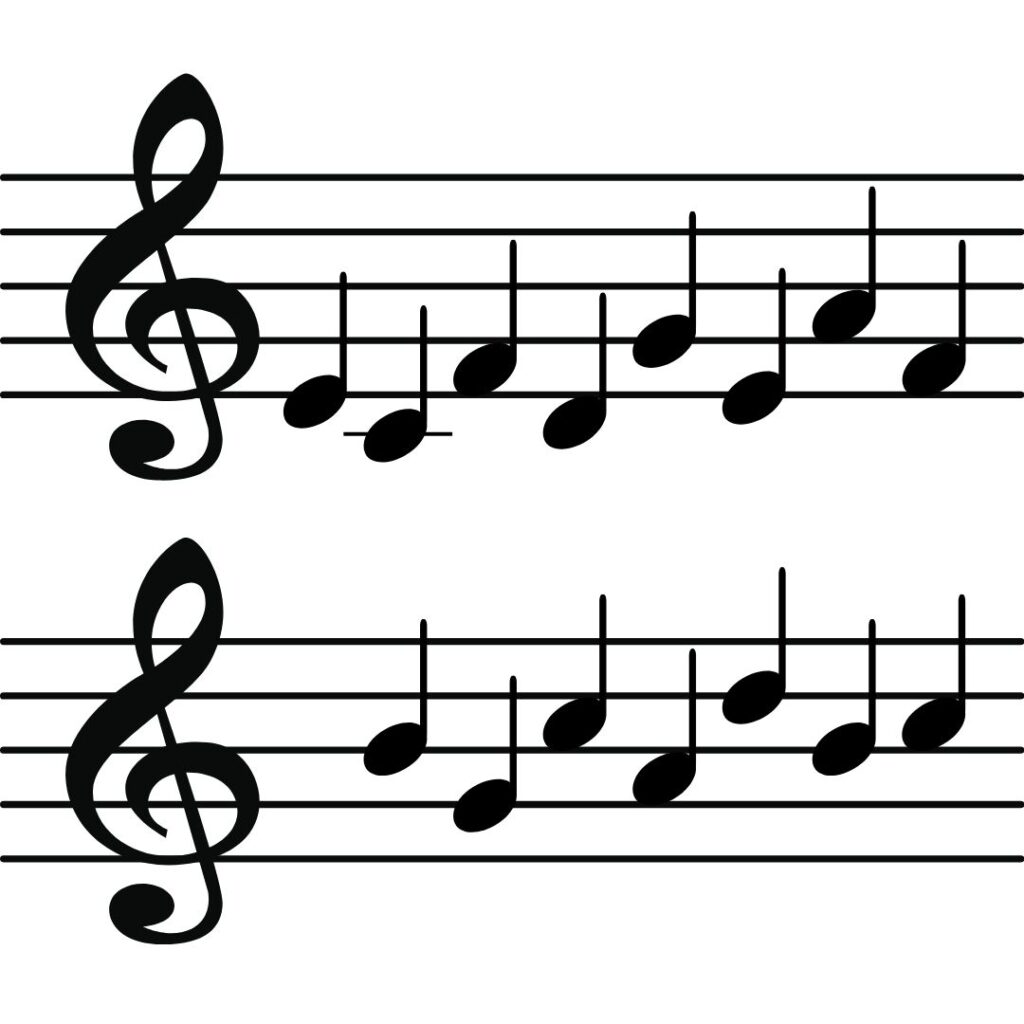
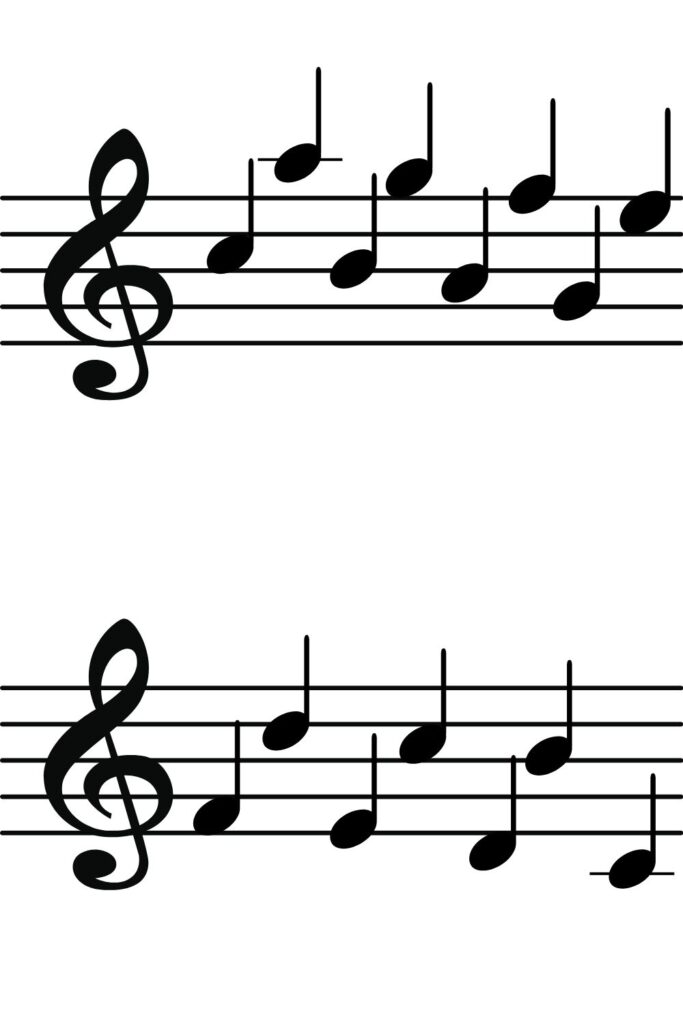
Start on low E, and go down a 3rd and up a 4th:
So, E down a 3rd to C, up a 4th to F, down a 3rd to D, up a 4th to G, etc.
Up: E C F D G E A F B G C A D B C
Then,
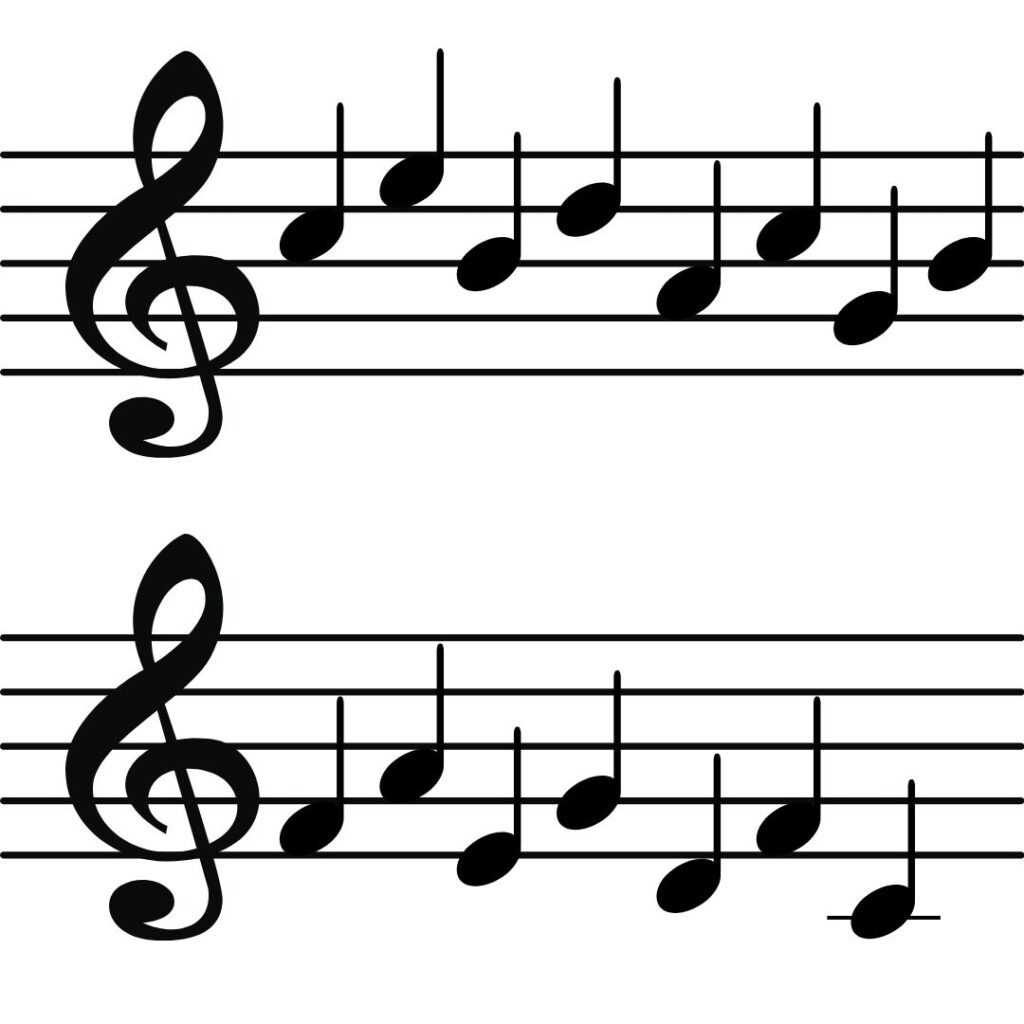
Go up a 3rd and come down a 4th:
So, C up a 3rd to E, down a 4th to B, up a 3rd to D, down a 4th to A, etc.
Down: C E B D A C G B F A E G D F C
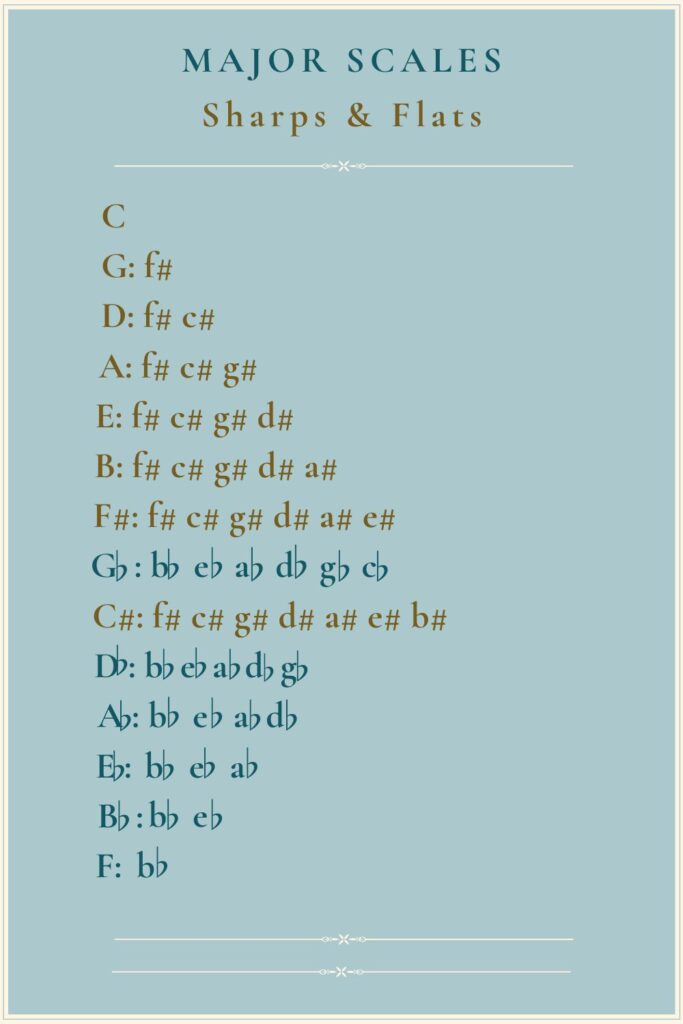
Then add 1 sharp at a time, until you have added all the sharps:
F# C# G# D# A# E# B#
Then add 1 flat at a time, until you have added all the flats:
B-flat, E-flat, A-flat, D-flat, G-flat, C-flat
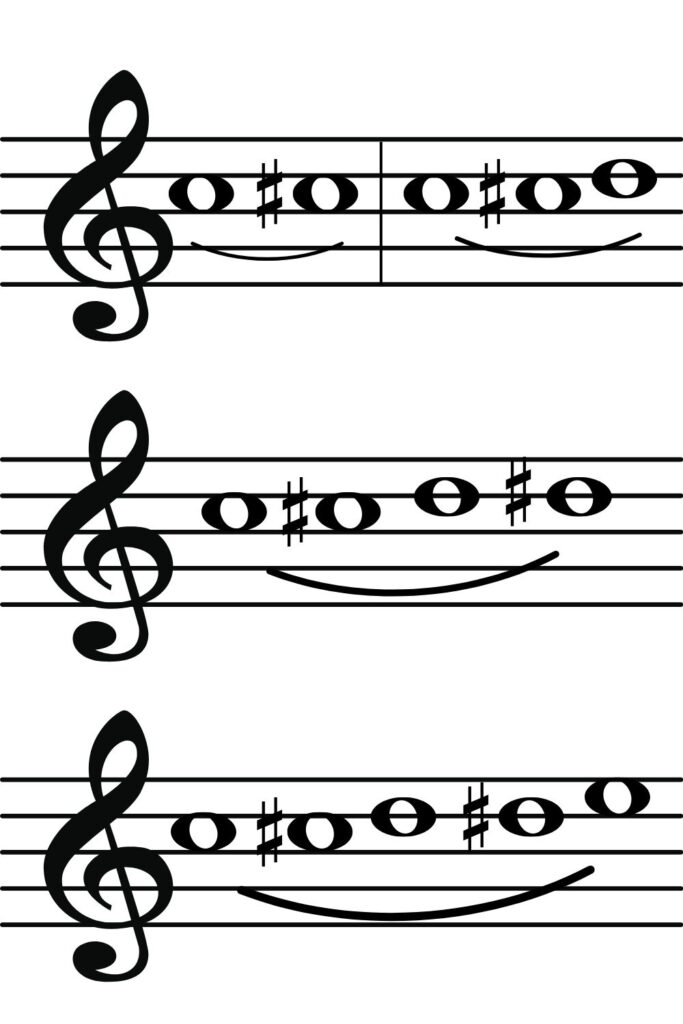
5ths, 6ths, and 7ths:
Now, go on to this exercise. Continue to do these slurred. Once you are comfortable with playing these interval patterns, add the metronome. Start slowly and work your way to playing faster in a slow and comfortable way. Even and slow notes sound better than uneven and fast notes!
Start on low C, and go up a 6th and down a 5th:
So, C up a 6th to A, down a 5th to D, up a 6th to B, down a 5th to E, etc.
Up: C A D B E C F D G E A F B G C
Then,
Come down a 6th and go up a 5th:
So, A down a 6th to C, up a 5th to G, down a 6th to B, up a 5th to F, etc.
Down: A C G B F A E G D F C E B D A C
Then,
Go down a 6th and up a 7th:
So, A down a 6th to C, up a 7th to B, up a 6th to D, up a 6th to C, etc.
Up: A C B D C E D F E G F A G B A C
Then,
Go up a 6th and come down a 7th:
So, C up a 6th to A, down a 7th to B, up a 6th to G, down a 7th to A, etc.
Down: C A B G A F G E F D E C D B C
Then add 1 sharp at a time, until you have added all the sharps:
F# C# G# D# A# E# B#
Then add 1 flat at a time, until you have added all the flats:
B-flat, E-flat, A-flat, D-flat, G-flat, C-flat
Octaves & Harmonics:
Doing octaves will cover the last interval, 8ths. And because many notes on the flute in the second and third octaves (and all the notes in the fourth octave), are harmonics, we will also practice overtone exercises. Slur these exercises.
Octaves:
Start on low C, then overblow to the C above that, keeping the low C fingering. Do this back and forth 10 times, slurring these.
Go up the scale chromatically, one octave. Keep the lower register fingerings for C, C#, D, and D#. Overblow those notes. And do this exercise, slurred, 10 times for each octave.
Then, go on to this exercise.
Harmonics:
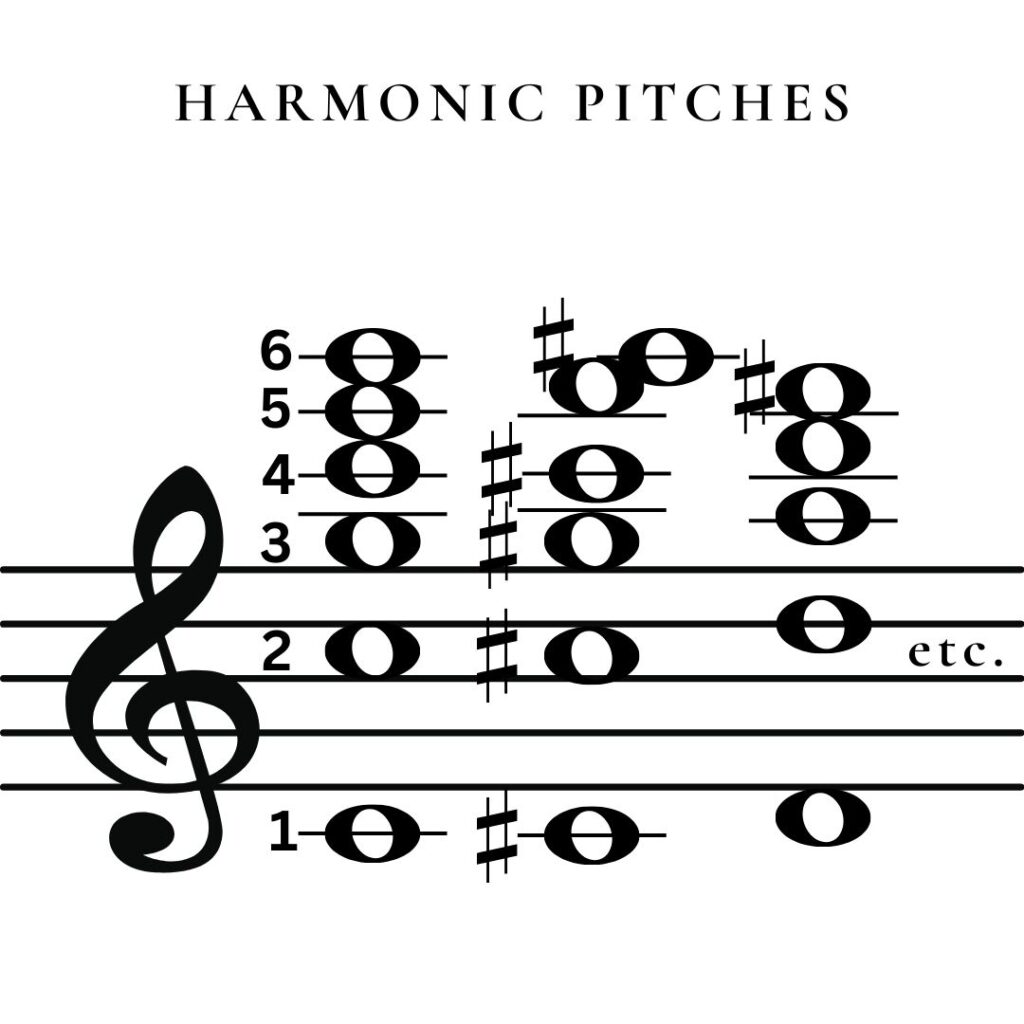
These exercises are so good for your embouchure!
Go back to low C. Overblow to the C an octave above that, keeping the low C fingering. Then overblow to the next harmonic, which is pitch G. Play pitches 2 and 3, back and forth, 10 times. Continue to slur the notes, keeping your slurring smooth and controlled.
Then play pitch G, harmonic 3, and overblow to the next harmonic, which is pitch C, harmonic 4. Do this 10 times.
Then play pitch C, harmonic 4, and overblow to the next pitch, which is pitch E, harmonic 5. Do this 10 times.
Then go back down to C#, and repeat this pattern, going up the scale chromatically, playing the harmonics as high as you can. Keep the lower register fingerings for C, C#, D, and D#.
Harmonic Patterns:
C-C-G-C-E-G
C#-C#-G#-C#-F-G#
D-D-A-D-F#
D#-D#-A#-D#-G
E-E-B-E-G#
F-F-C-F
F#-F#-C#-F#
G-G-D-G
G#-G#-D#-G#
A-A-E
A#-A#-F
B-B-F#
C-C-G
Then try variations of these patterns. For example, try going from harmonic pitch 2 to harmonic pitch 4, back and forth. Or from pitches 1 to 2 to 3, then back down. And remember to keep your slurring smooth and controlled.
Daily practice of intervals helps you to learn solos faster. Take a closer look at the pieces you are studying, and you will see the intervals that you have been practicing!
4. VIBRATO
Vibrato should embellish a good tone, which was practiced in exercise #1.
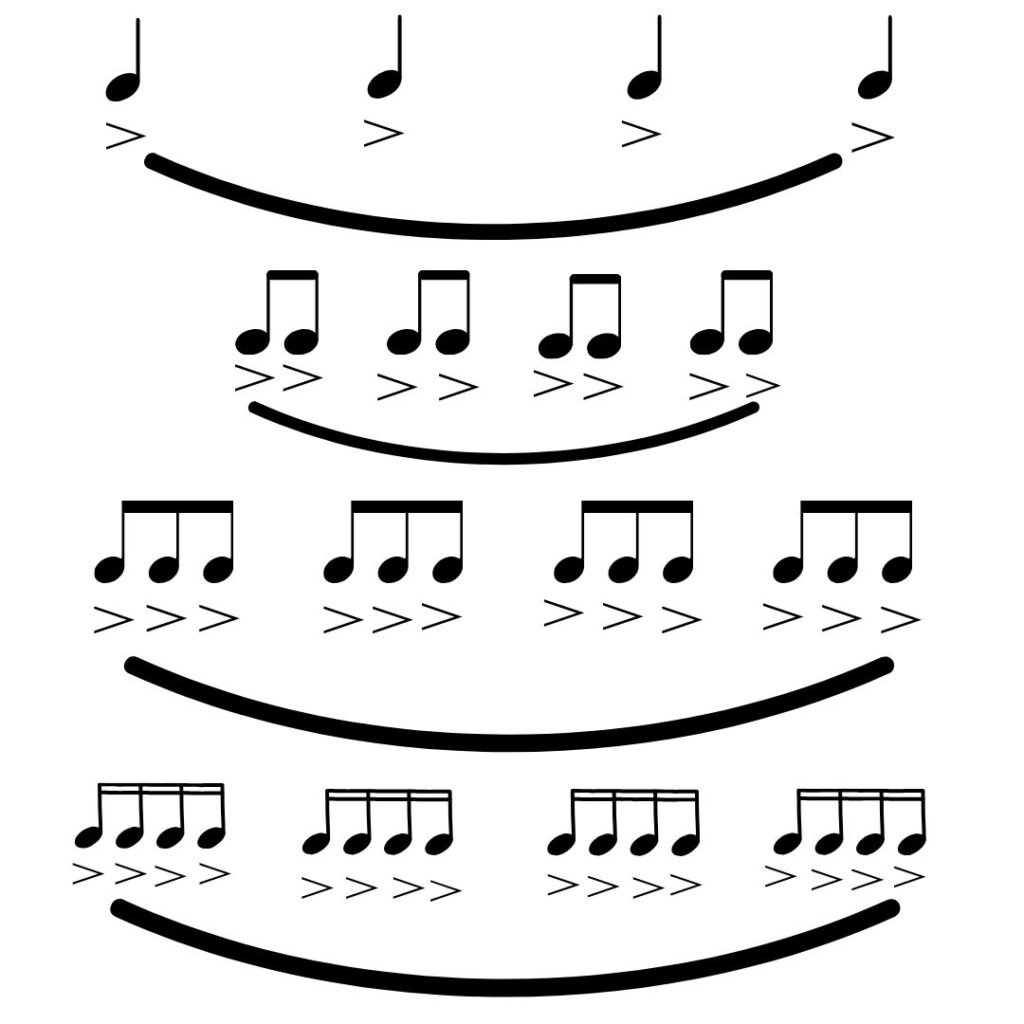
Start on a note somewhere in the middle of the 2nd octave. G is a good place to start. Use a metronome, set around 60 for a quarter note.
*Play 4 quarter notes, slurred, accenting each note.
Then 4 sets of eighth notes, slurred, accenting each note.
Then 4 sets of triplets, slurred, accenting each note.
Then 4 sets of sixteenth notes, slurred, accenting each note.
Keep the pulses even, so your vibrato is clean and steady. Speed up the metronome as you can. Go up chromatically as high as you can. Then come back to the note where you began, and go down chromatically.
These warm-up exercises take time to go through! So, consider how much time you have to practice, and devote at least a quarter of that time to these exercises. Keep track of what you have played, so you can start from where you left off the next day. This is a great way to get ready for any solo that you want to learn. These exercises will develop your tone, your embouchure, your breath support, your control of your intonation, and your ability to play evenly, and fast! So, choose something from every section of this list to practice every day, and watch yourself improve!
Practice Charts

Click Here for a Printable Practice Chart
Click Here for a Printable Colored Practice Chart
And remember to take a 5 minute break every 25 minutes of practicing, so that you avoid overuse injuries!
Practicing wishes,
Marilee
Here are some items that will help you with your practicing and with caring for your flute:
(As an Amazon Associate, I earn from qualifying purchases.)
Miniature & Portable Wind-Up Metronome
Traditional Pyramid-Shaped Wooden Metronome
100% Soft Cotton Handkerchiefs for Cleaning Your Flute
Liquid Hand Soap, Rinses Clean
Follow me for more fun with the flute!
Listen to a performance of Courante By J. S. Bach on my YouTube Channel:
Marilee Boekweg A Flutist’s Garden
And print the free sheet music, Courante BWV 1007, here:
Courante, arranged for Flute, Sheet Music
And take a look at these posts:
A Musician’s Treasure Box: free printable charts to help musicians with their practicing
Why You Secretly Dislike Classical Music & What To Listen To Instead
© 2025 Marilee Boekweg. Prints are free to share for personal and non-commercial use. Not for resale, commercial use, or inclusion in products for sale.
After subscribing, click here to receive free 2026 monthly calendars:
2026 Monthly Calendars-A Crafting Home Giveaway
Discover more from Crafting Home
Subscribe to get the latest posts sent to your email.
